First Steps with SimpleDMS
In the following article, you will learn everything you need to know for your first steps in SimpleDMS. You will get to know the most important components and how to initially set up SimpleDMS.
For the setup, you must complete the following steps:
1. Create Space (Workspace)
First, you need to create a space.
Spaces are part of permission management. You can use them to determine which people are allowed to view and/or change which documents. Each space has its own document types, tags, and fields.
When you log in for the first time, SimpleDMS informs you on the dashboard that no space is yet available in the system and that you need to create one.
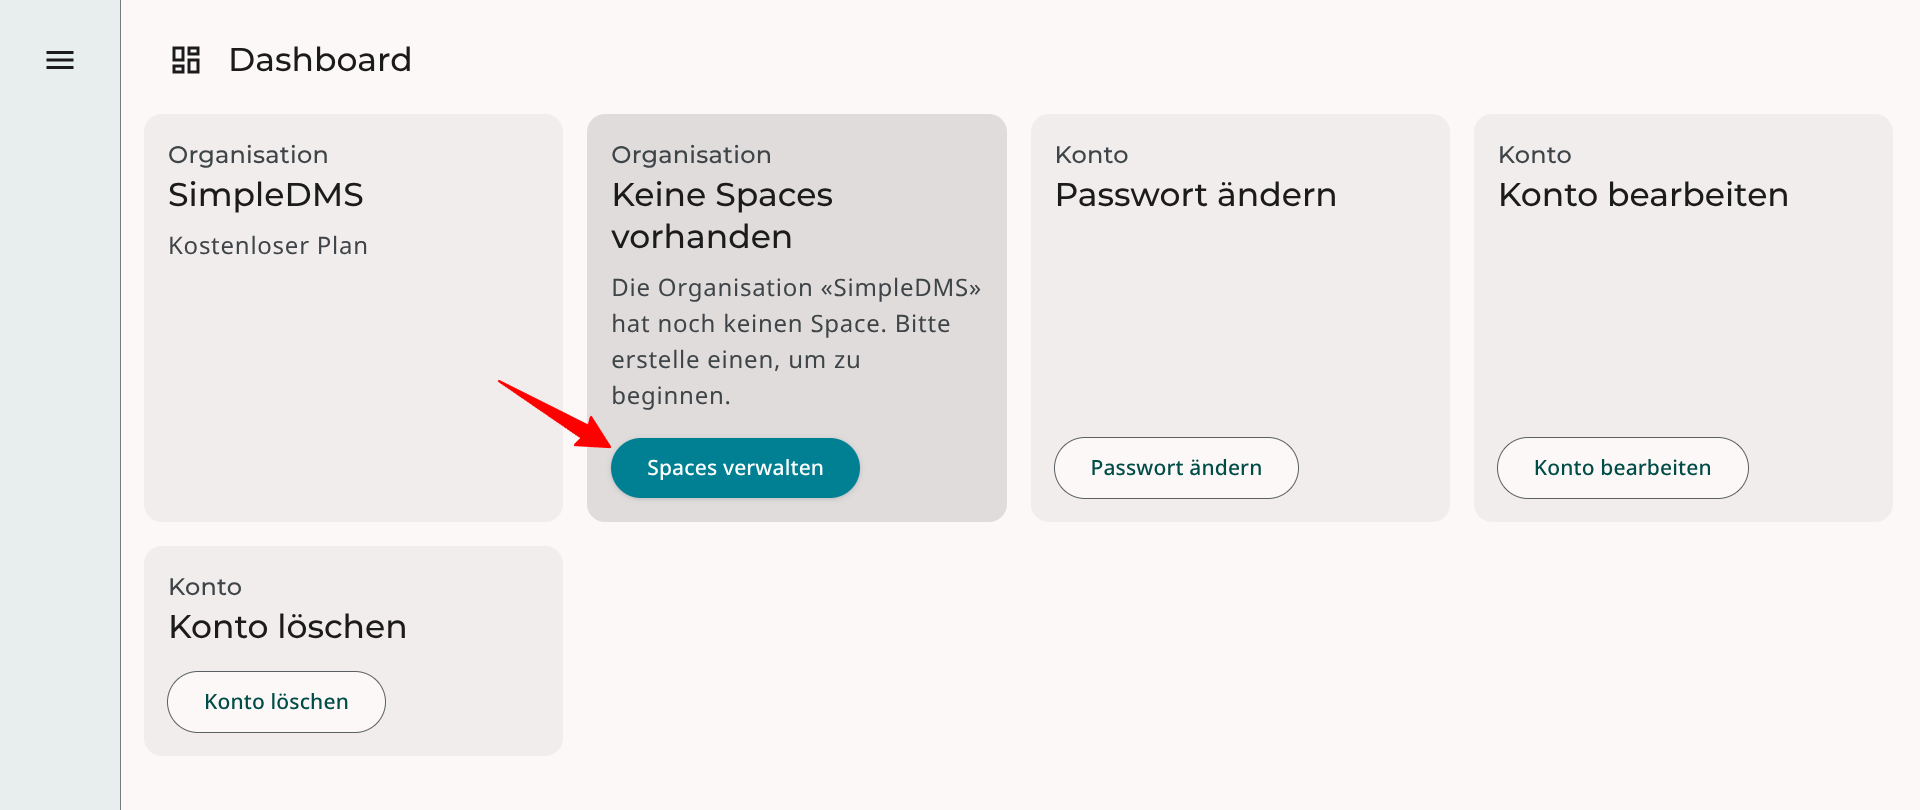
In the space management, you can now create your first space.

2. Create document type
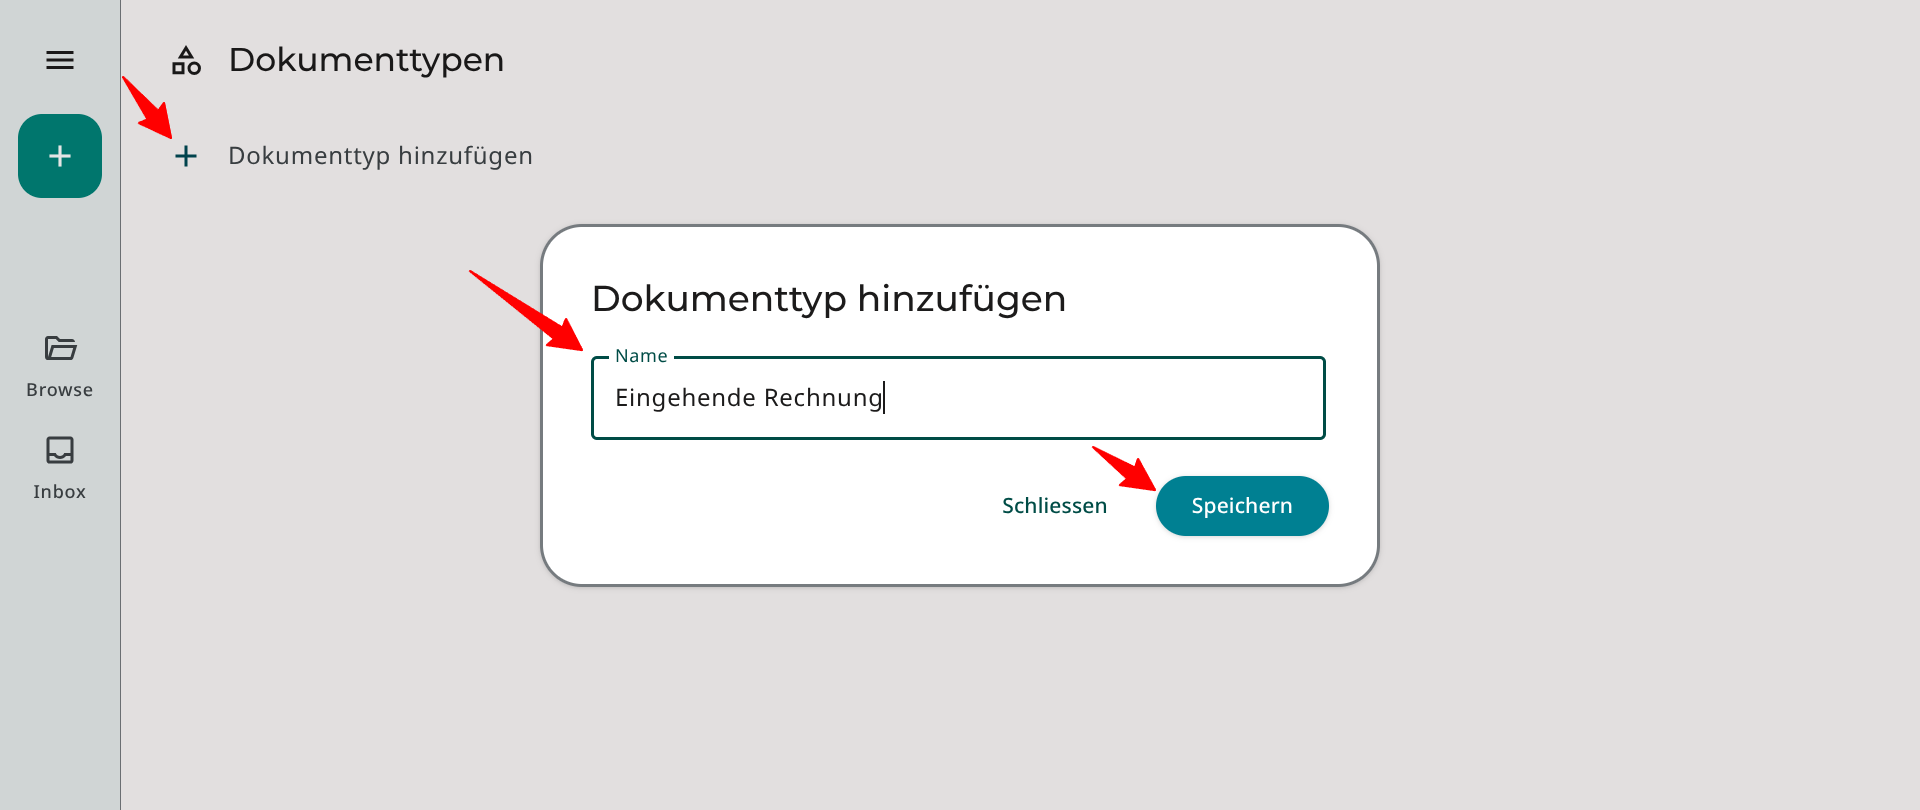
Next, you need to create your first document type. In this guide, we will create the document type «Incoming Invoice».
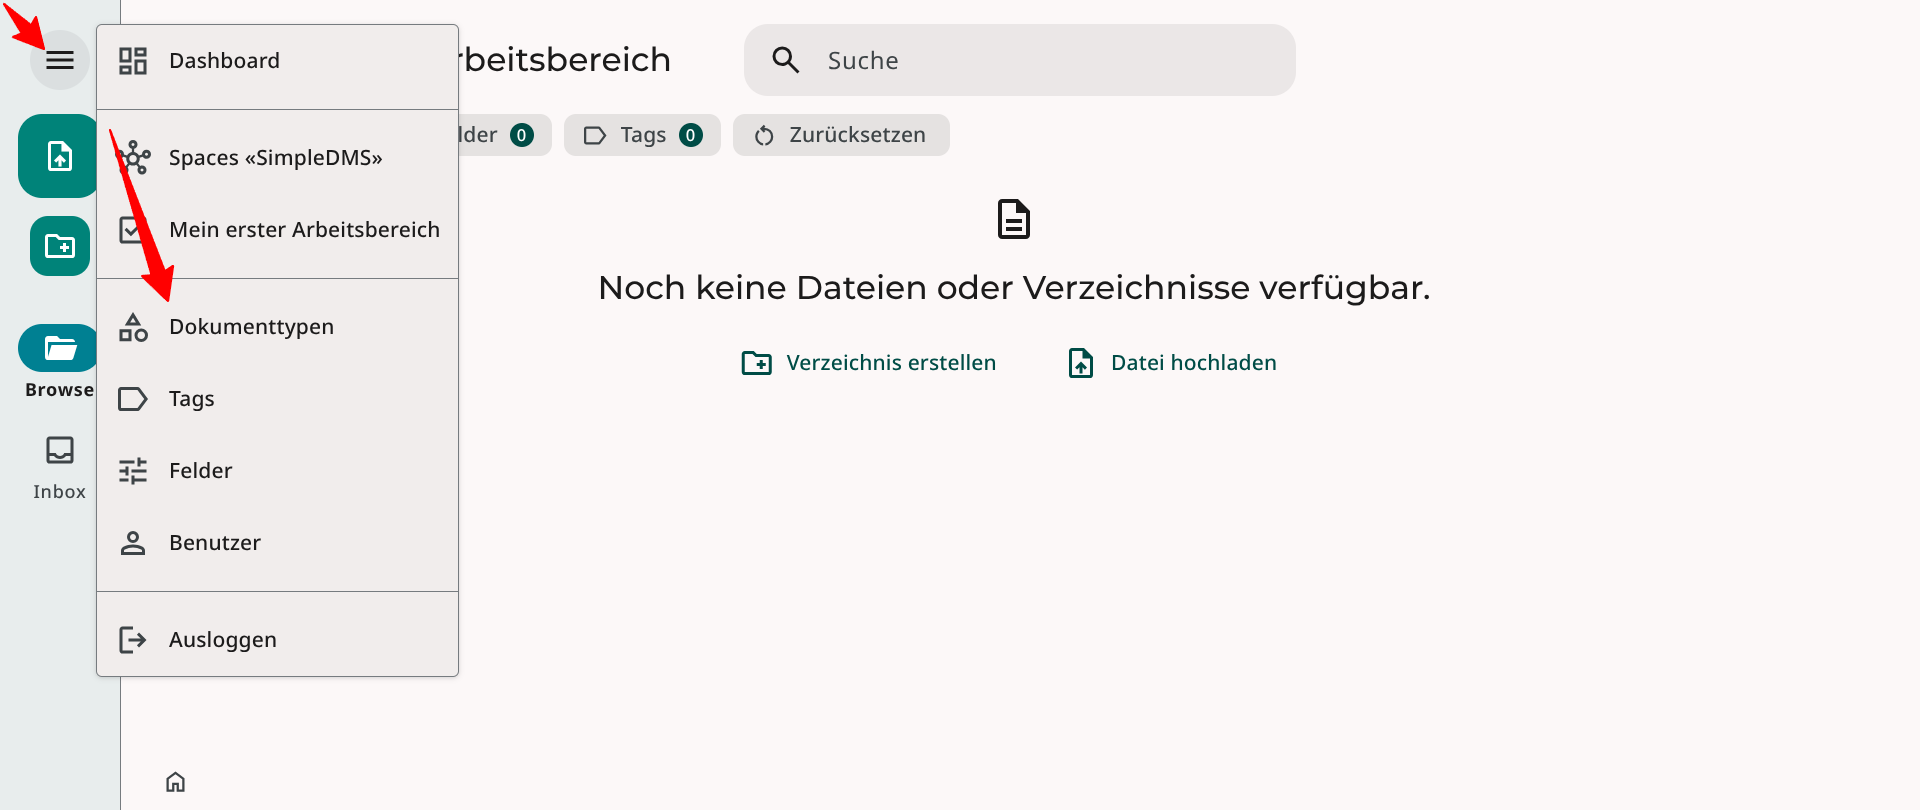
To do this, first select your newly created space and then switch to document type management via the menu.
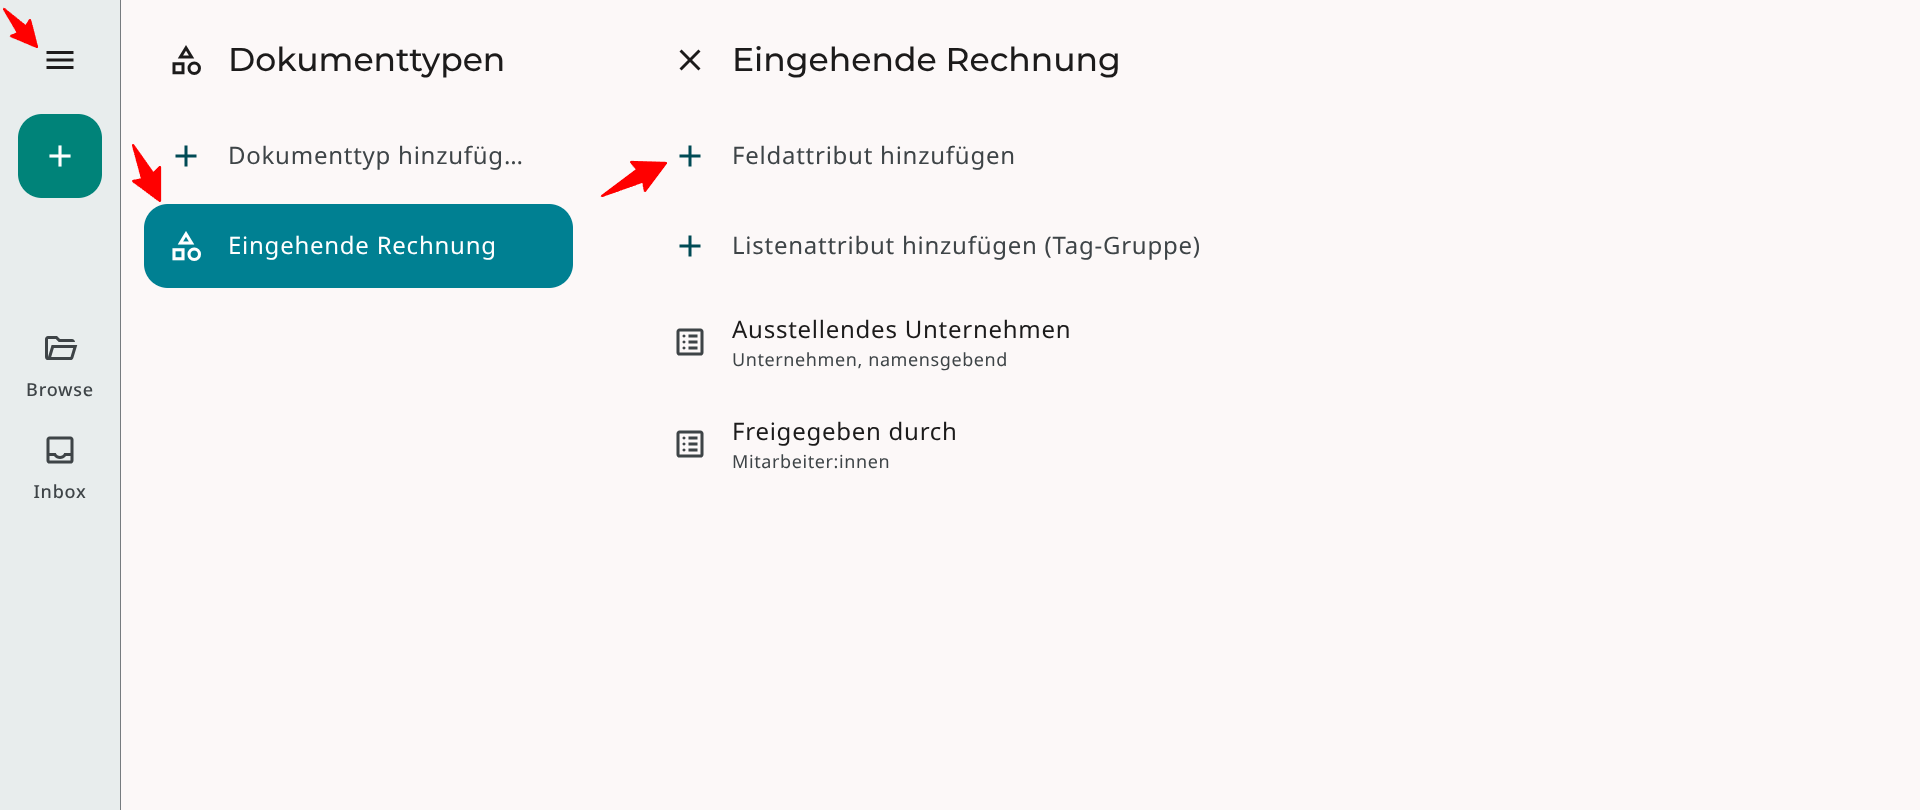
Now create your first document type. After creating it, you can select it in the list and optionally add fields or lists (tag groups) as attributes. Since we haven't added any fields and tag groups to the system yet, we must add them first.
3. Configure tags and fields
For the document type «Incoming Invoice», we need the following attributes:
- Issuing company
- Receipt date
- Approved by
- Approved on
- Paid on
List attributes
«Issuing company» and «Approved by» are list attributes. List attributes reference tag groups.
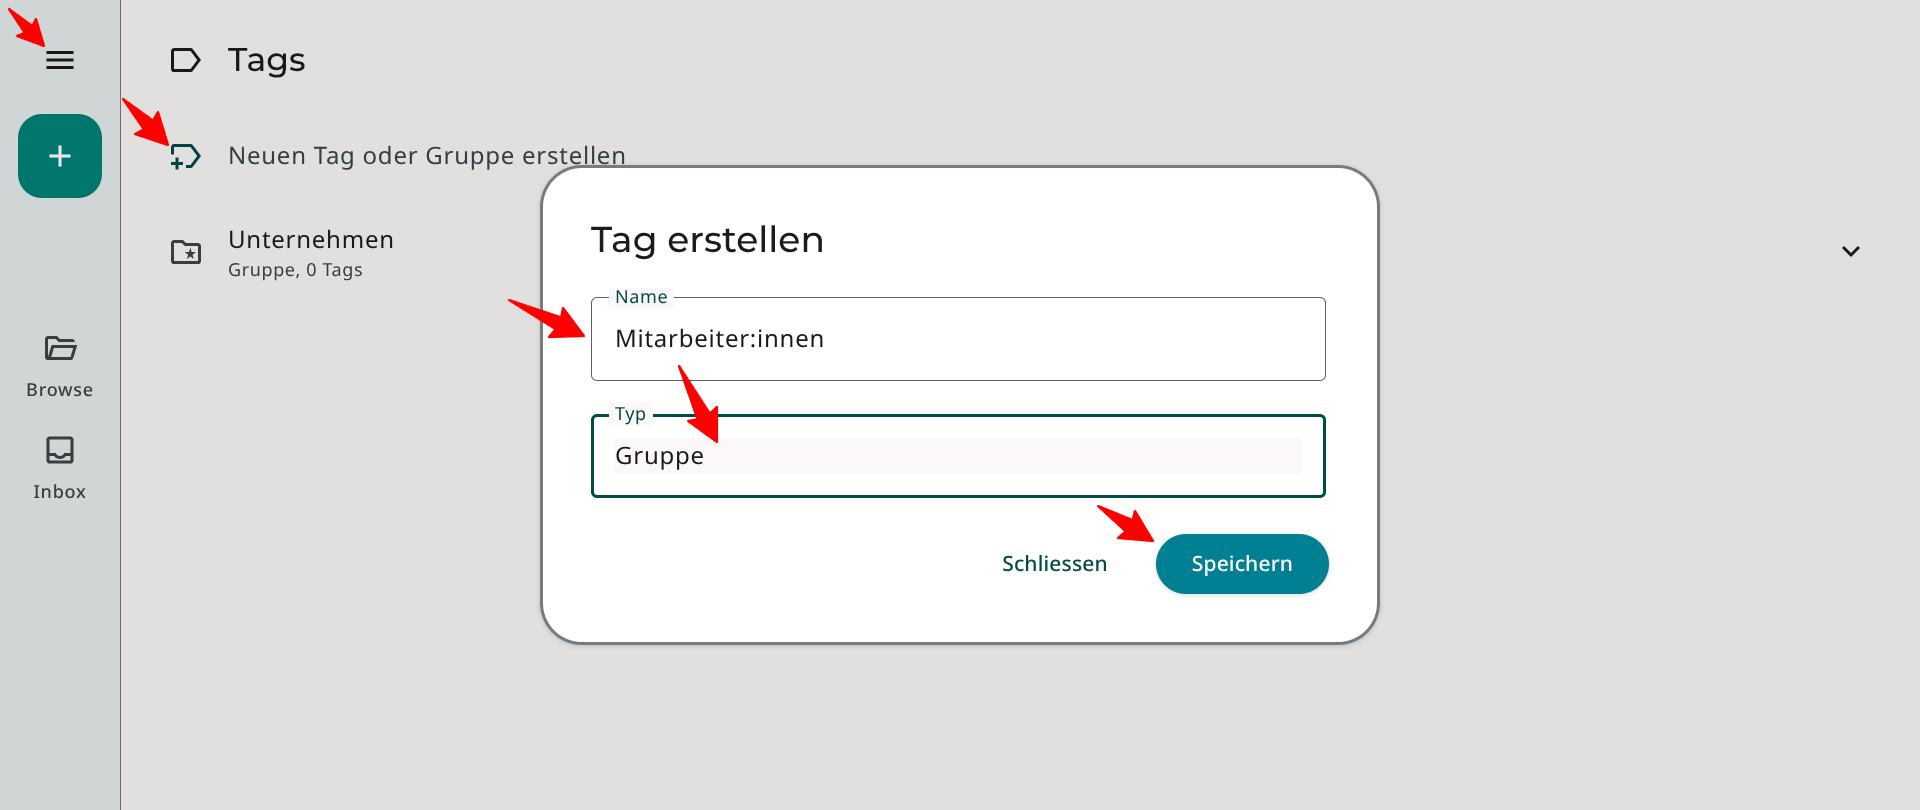
Therefore, we must first create the following two groups in the tag management («Tags» in the main menu):
- Company
- Employees
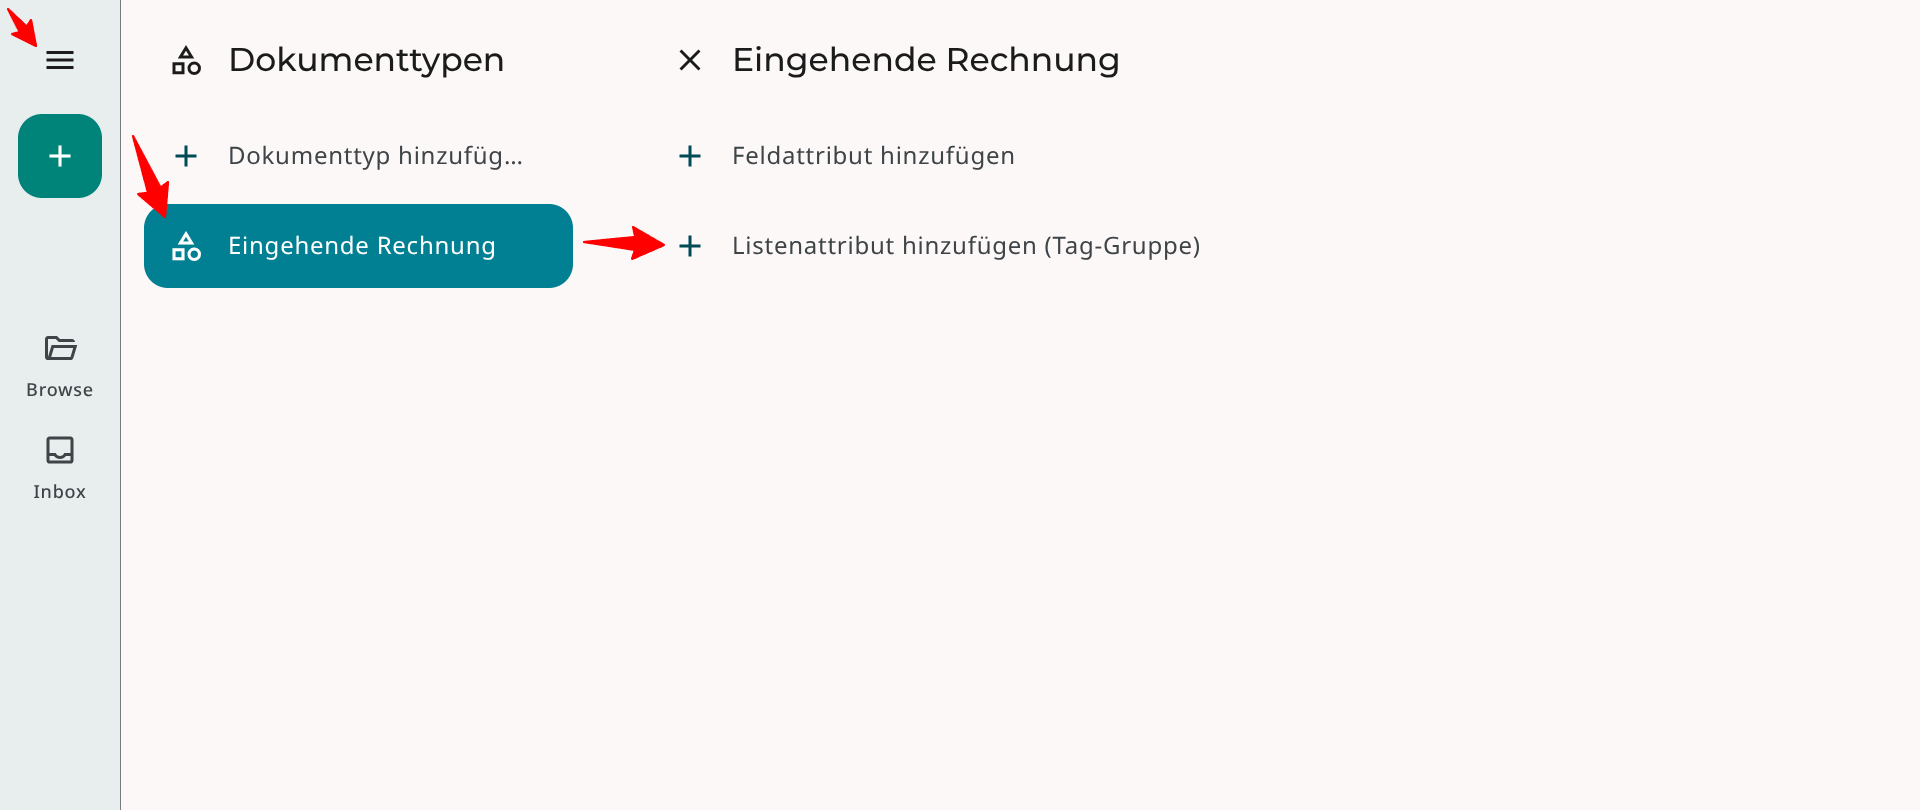
Afterwards, it is possible to add the tag groups as list attributes in the document type management («Document types» in the main menu).
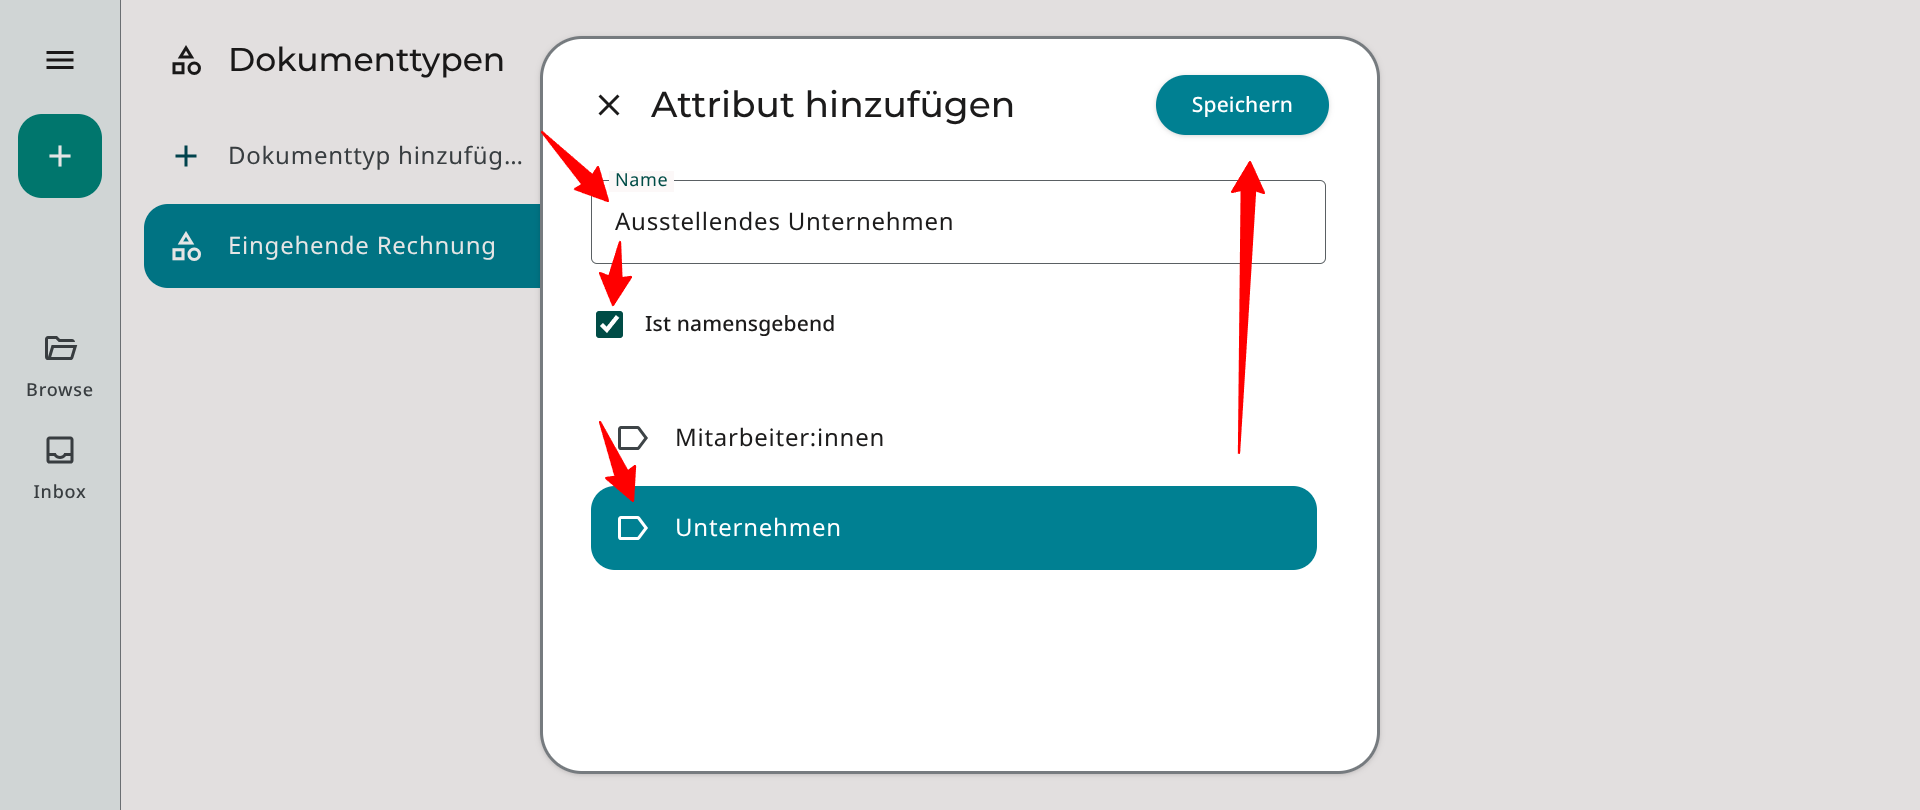
We define the list attribute «Issuing company» as «name-giving». This means the assigned value is used to identify the invoice documents in SimpleDMS.
Field attributes
«Receipt date», «Approved on» and «Paid on» are field attributes. Fields are independent of the tag system.
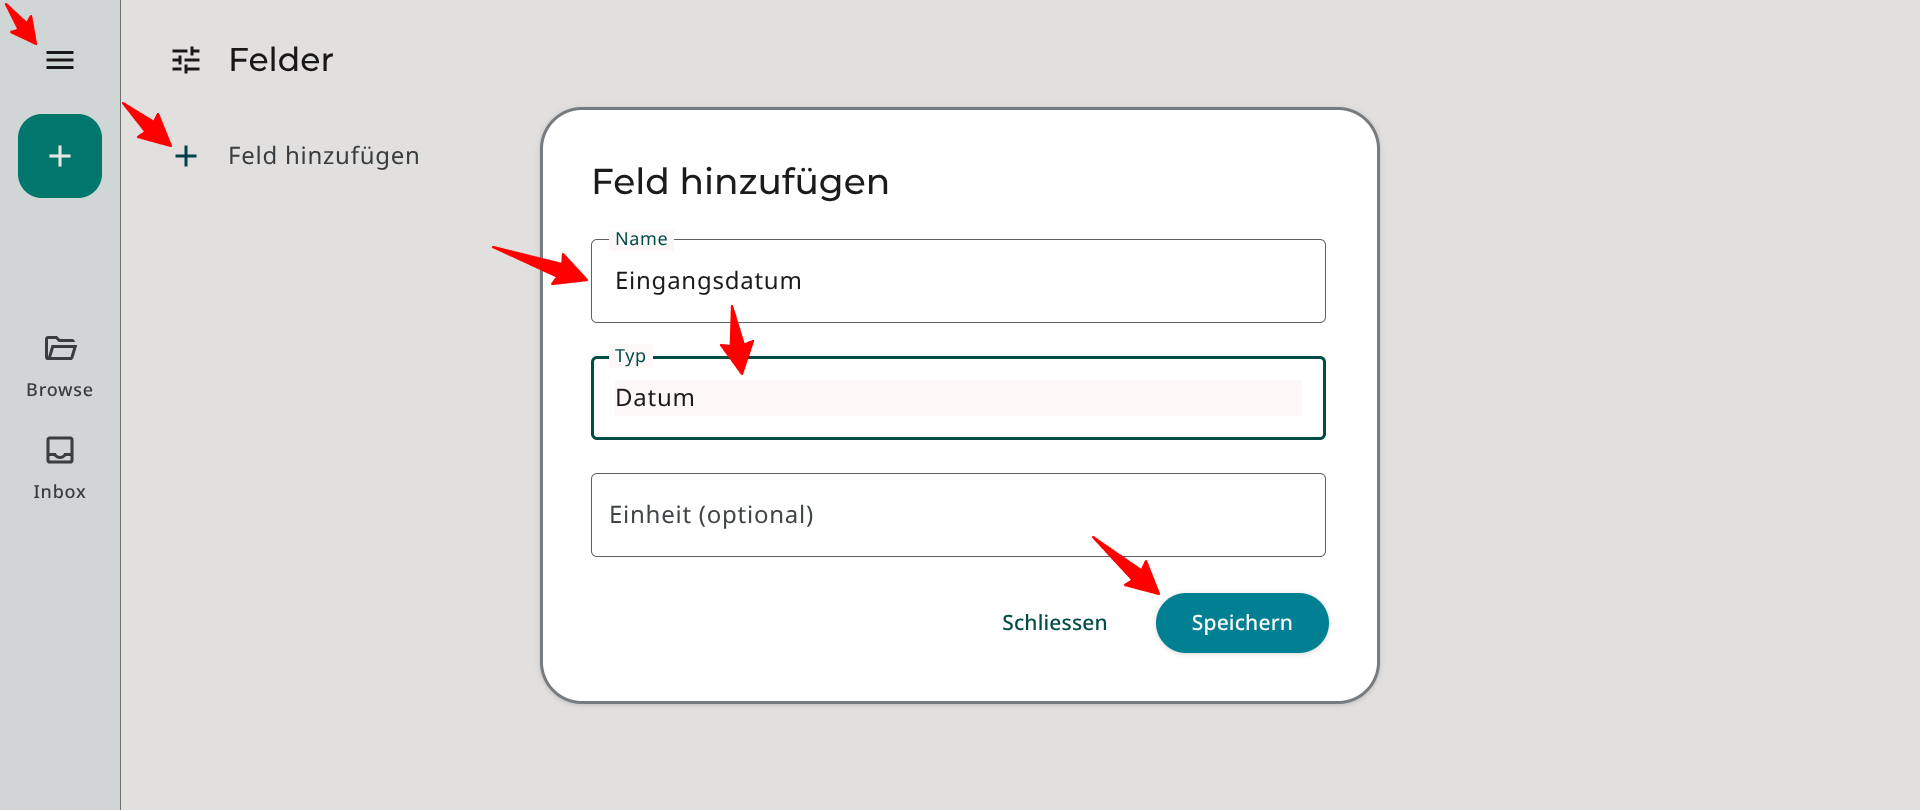
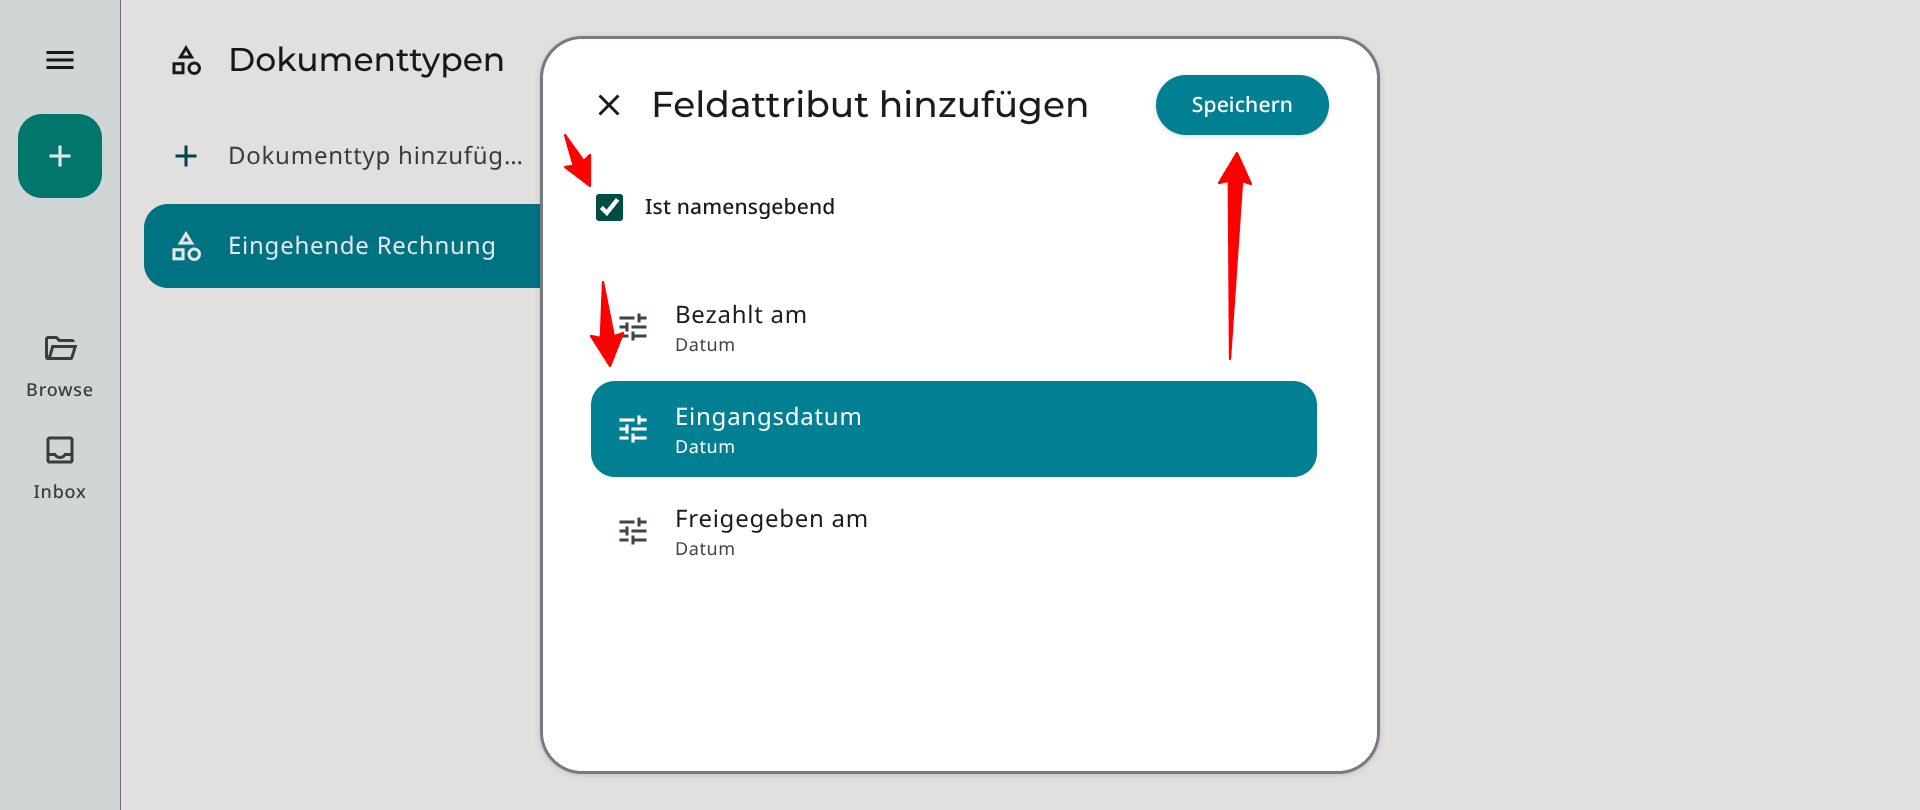
The fields must first be created in the field management («Fields» in the main menu). All three fields are of type «Date».
Afterwards, we can assign the fields as attributes to the document type «Incoming Invoice» in the document type management.
We define the field attribute «Receipt date» as «name-giving».
4. Upload and tag document
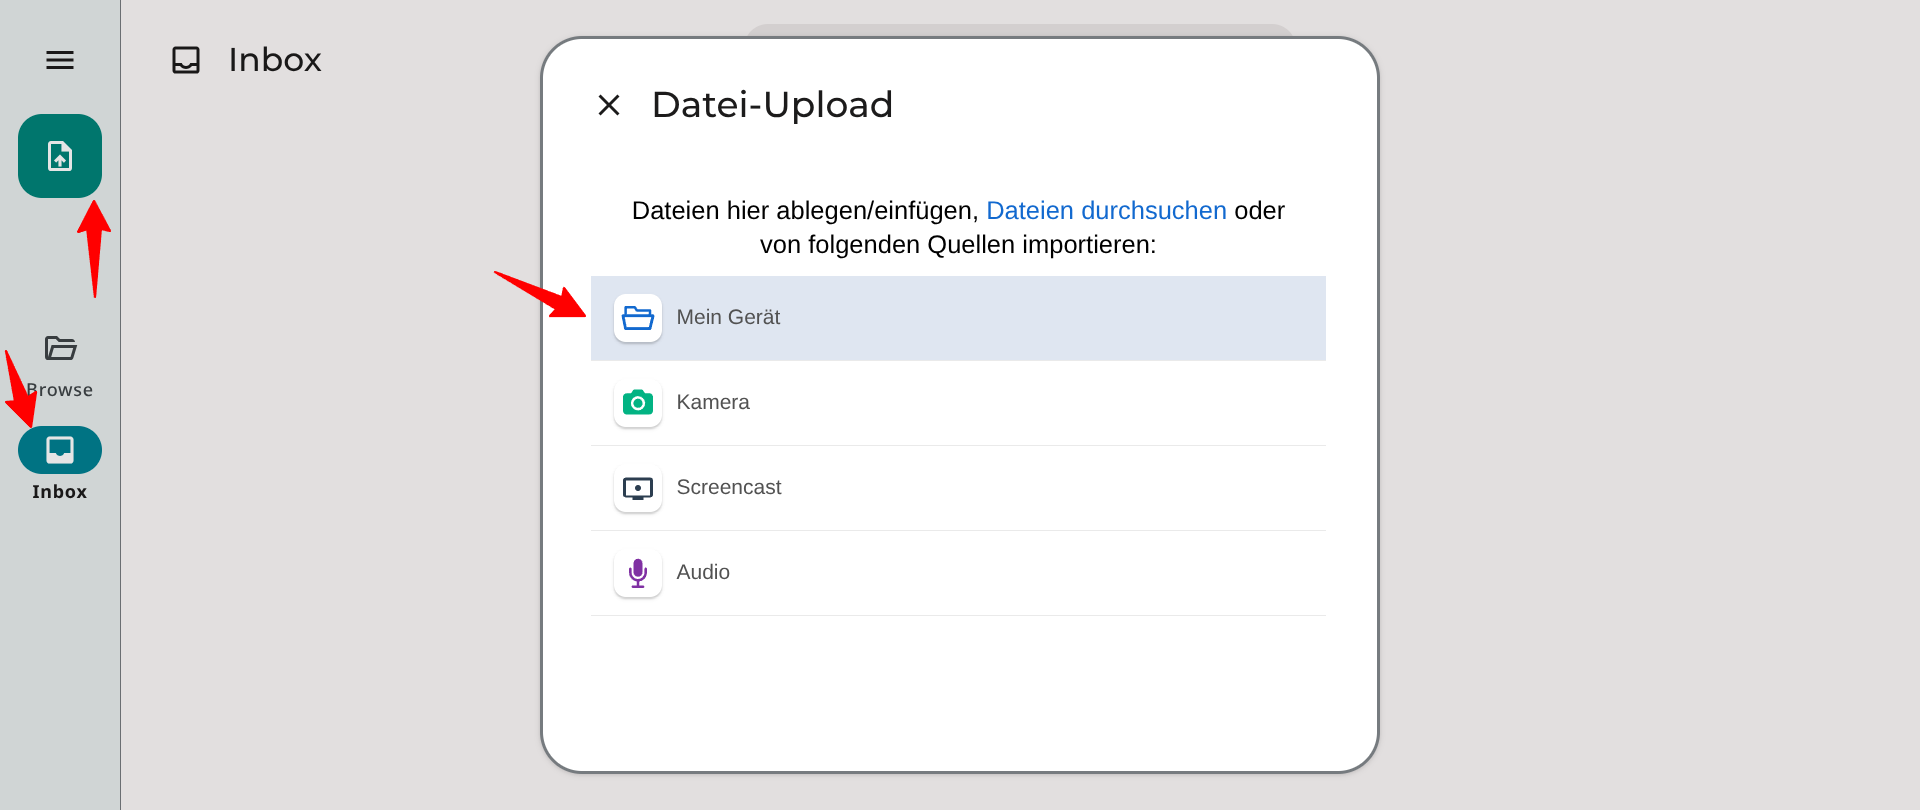
After the configuration of the document type «Invoice» is complete, we can upload the first invoice to the «Inbox» and provide it with metadata.
To do this, switch to the «Inbox» via the left sidebar and press the button to upload documents.
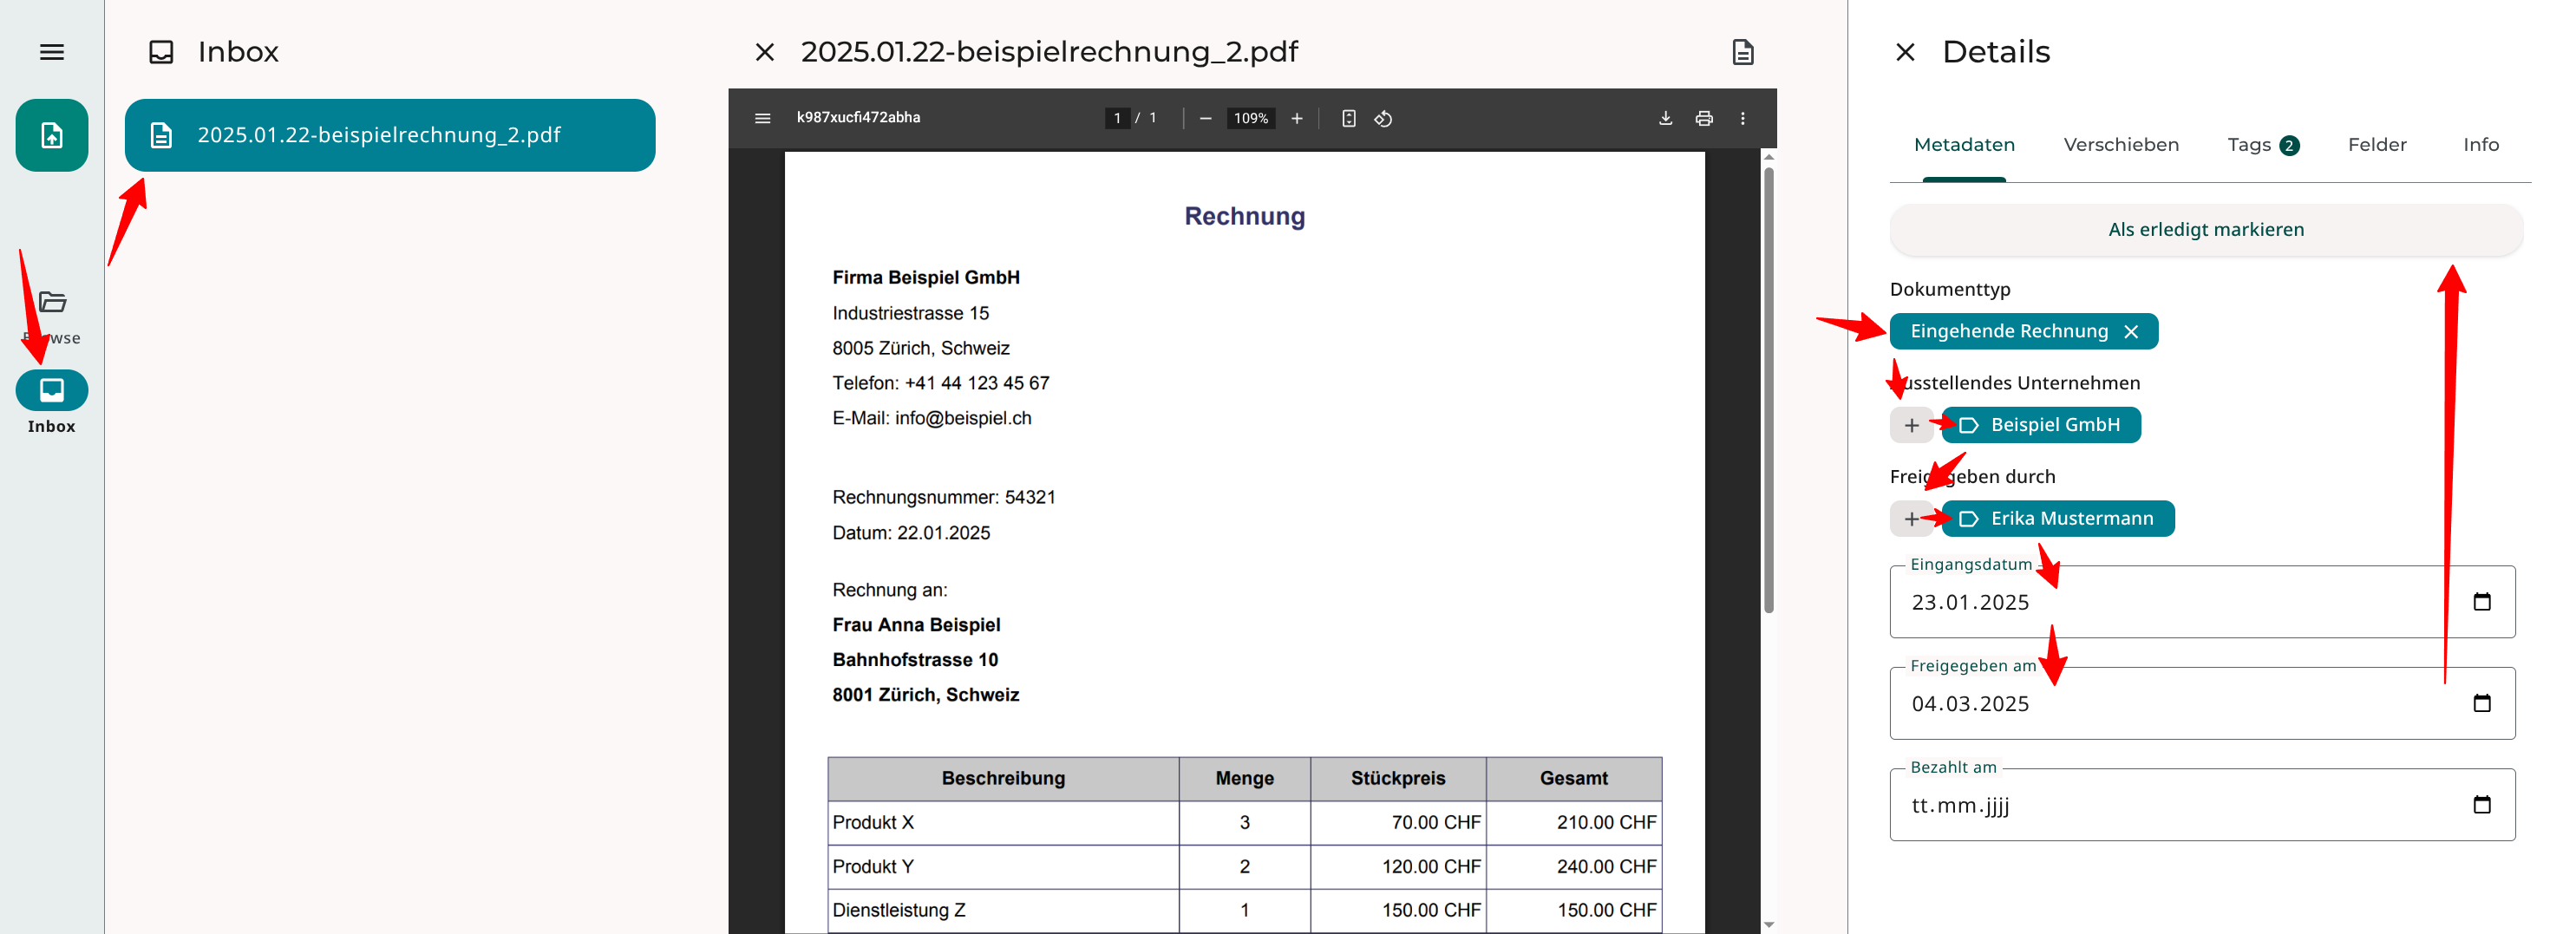
After you have uploaded the invoice, you can select it in the list and select the values for the attributes in the right sidebar.
The assignment of values is not definitive; changes are also possible at a later date.
With a click on «Mark as done», the document is removed from the inbox and can from now on be found via the «Browse» view.
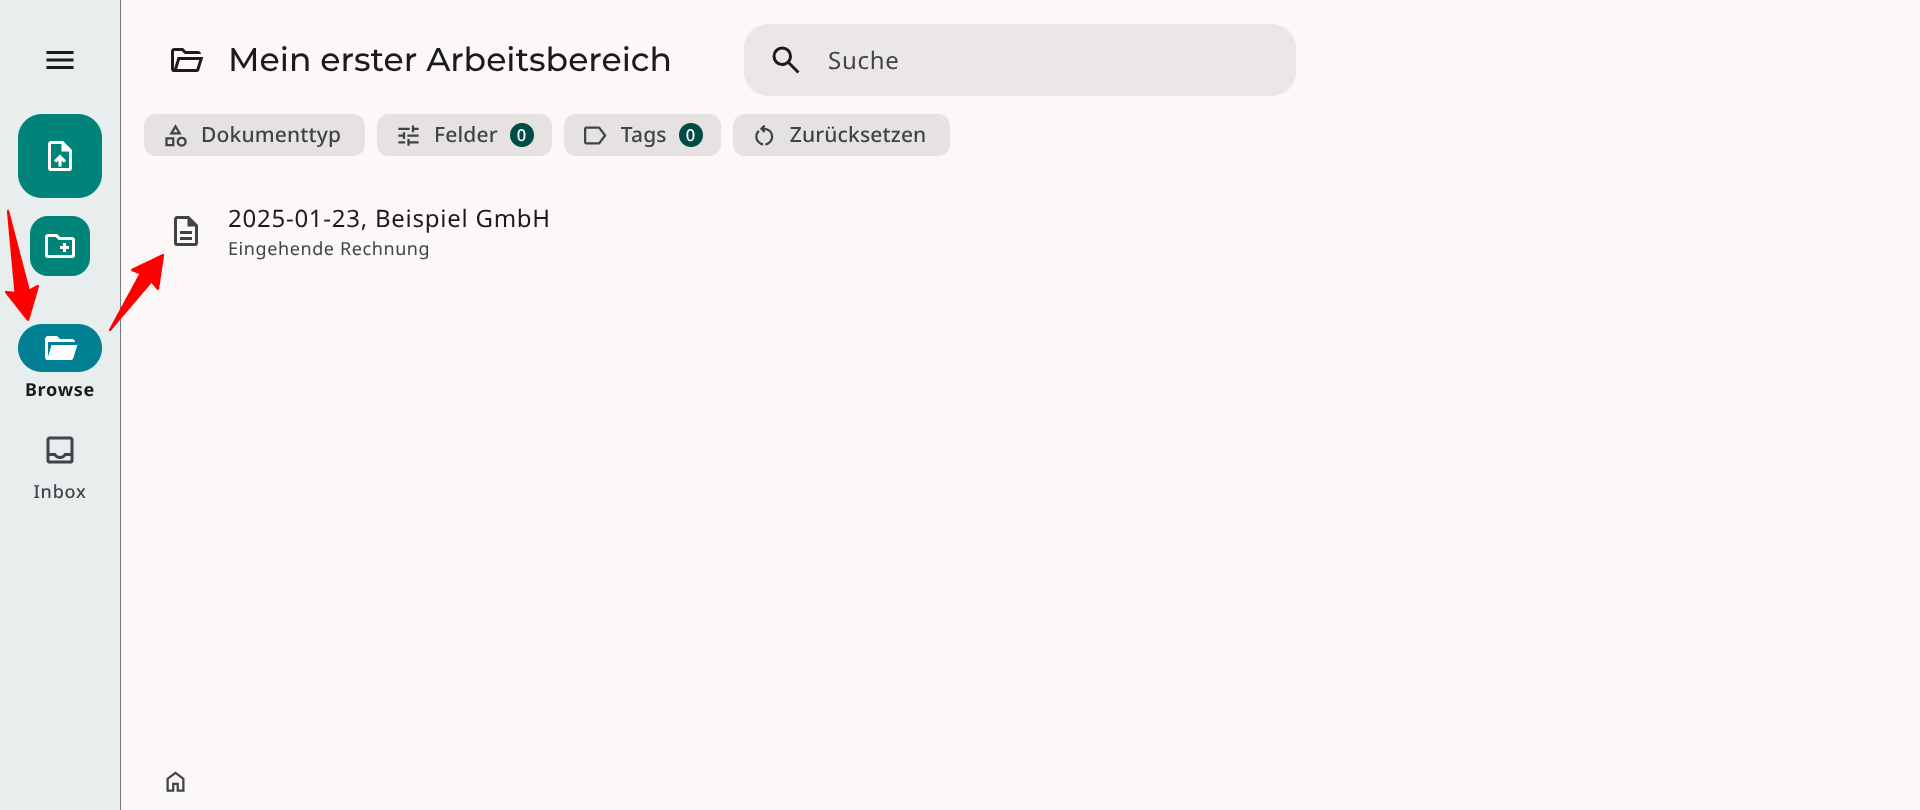
Open document
Finally, you can switch to the «Browse» view via the left sidebar and you should see your invoice there.
In the overview, you can now also see the effect of the «name-giving» attributes on the document's designation.